Creating Custom Views
Custom Views provide quick access to the business asset data that you access frequently or data that you want to be readily available. You can create custom views for all business asset types using criteria sets based on your requirements.
To create custom views, follow these steps:
- Go to Application Menu > Data Literacy > Business Glossary Manager > Explore.
-
In the business asset list, select a business asset.
-
In the Asset Workspace pane, click Custom Views.
The Custom Views pane appears. It displays a list of available views, if any.
-
Click ADD.
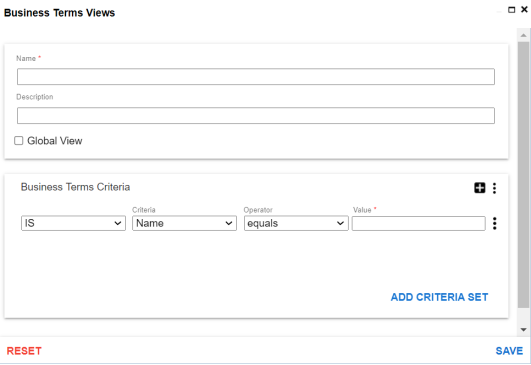
The <Business Assets> Views page appears.
-
Enter appropriate values in the fields. Fields marked with a red asterisk are mandatory. Refer to the following table for field descriptions.
You can also add multiple conditions to a criteria set. In the <Business_Assets> Criteria section, clickField Name
Description
Name
Specifies the name of the custom view.
For example, BON View.
Description Specifies the description of the custom view.
For example, Displays BON custom view.
Global View Specifies whether the custom view is accessible for everyone using the application.
<Business Asset> Criteria Specifies the criteria based on which data is displayed in the custom view.
For example, to display all business terms with a catalog name that contains TechPubs, set the criteria as follows:
- IS
- Criteria: Catalog Name
- Operator: contains
- Value: TechPubs
 . Alternatively, you can also add multiple criteria sets. To add criteria sets, click Add Criteria Set.
-
Click Save.
A custom view is added to the Custom Views list.
Once you create custom views, you can manage them. Managing Custom Views involves:
- Modifying views
- Deleting views
|
Copyright © 2023 Quest Software Inc. |